How to Clean Beam-Splitter Teleprompter Glass: The DP Guide to Optical Care and Streak-Free Takes
Learn how to clean delicate 70/30 beam-splitter teleprompter glass without stripping optical coatings, causing micro-scratches, or leaving camera haze. Master air dusting, lens-safe solutions, edge handling, and high-contrast remote prompting workflows.
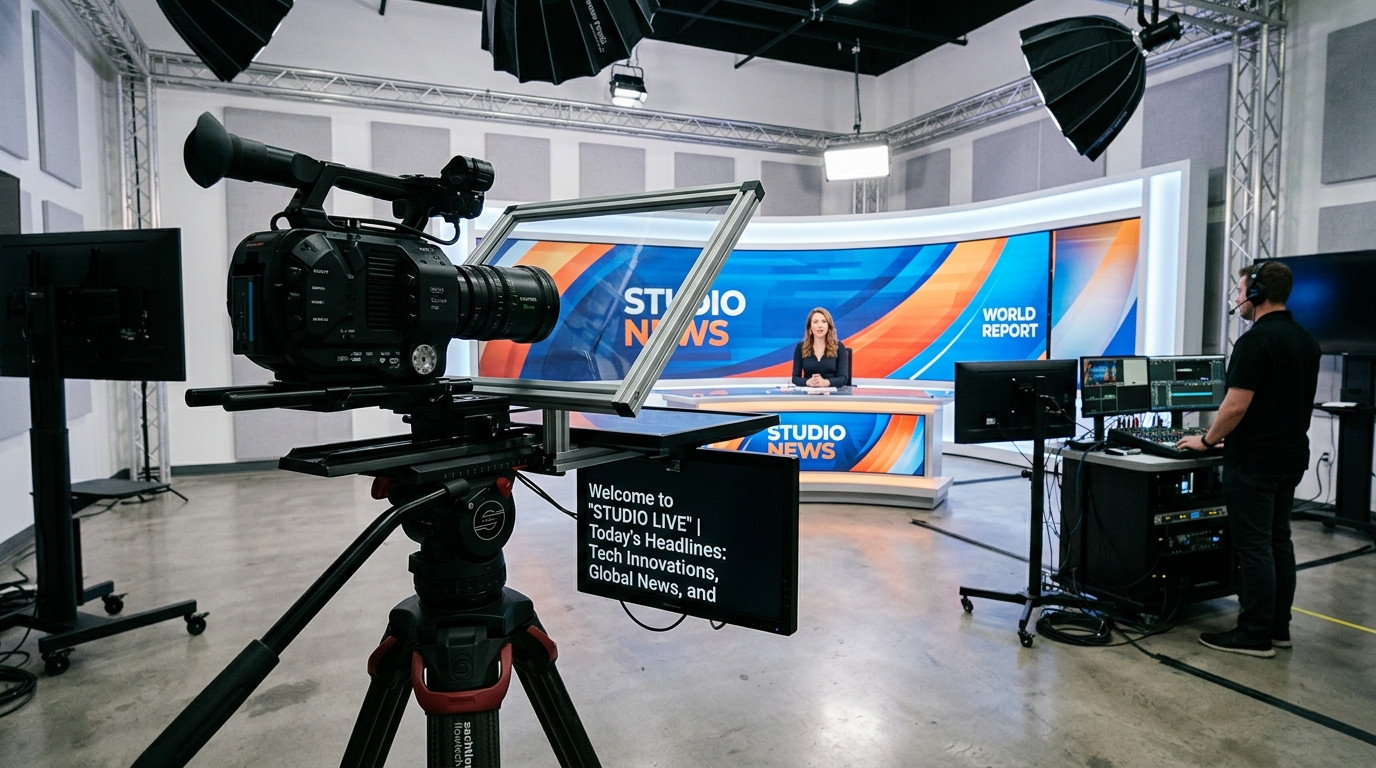
A teleprompter beam-splitter mirror is not ordinary picture-frame glass. In a professional studio or commercial video package, that glass is an optical-grade substrate coated on one side with a microscopically thin dielectric layer. That coating reflects roughly thirty percent of incoming monitor light toward the presenter while transmitting seventy percent through to the camera lens without degrading MTF resolution or introducing severe color casts. When finger oils, studio dust, or accidental spit droplets land on that glass, they degrade your camera image before the light ever strikes the camera sensor. If you treat that delicate surface like bathroom glass with a standard spray bottle and paper towels, you will strip the coating, leave permanent swirl marks, and ruin your rig.
Understanding how to clean, inspect, and maintain teleprompter glass protects your investment and ensures your lens sees an uncompromisingly crisp image on every take.
The Anatomy of Beam-Splitter Glass and Why Coatings Fail
Standard household glass cleaners rely on ammonia, isopropyl blends, and harsh surfactants designed to break down domestic grease. When applied to 70/30 or 60/40 beam-splitter glass, ammonia quickly breaks down the metallic and dielectric vapor deposition layers. What begins as a subtle purplish fringe or cloudy smear eventually turns into stripped coating patches, leading to uneven transmission, severe contrast loss, and ghosting artifacts.
Equally dangerous is physical abrasion. Paper towels and low-grade workshop rags contain wood fibers that act like fine sandpaper against optical coatings. Even a dry microfiber cloth can scratch glass if you drag ambient grit across the pane. Dust particles in production studios often contain microscopic silica and quartz minerals from construction materials or grip gear. Applying direct pressure without pre-cleaning grinds those hard minerals across the glass, cutting irreversible micro-scratches into the optical reflection plane.
The Four-Step Optical Cleaning Protocol
Treating beam-splitter glass demands the exact same protocol a camera assistant uses when servicing high-end cinema prime lenses. Always follow this structured sequence before rolling takes.
- Step 1: Contactless Dust Removal. Never touch the glass with a cloth while dry particulate rests on the surface. Use a handheld manual rocket blower or a clean, filtered bulb duster to blow away loose dust, pet dander, and grit from both sides of the pane. If using canned compressed air, hold the can upright at a safe distance and test-fire away from the glass first to avoid spraying liquid propellant freezing agents onto the optical coating.
- Step 2: Wet Solution Application. Never spray cleaning liquid directly onto the teleprompter pane. Liquid can pool at the bottom frame clamp, dissolve bezel adhesives, or seep beneath the neoprene hood seals. Instead, lightly mist an optical-grade lens cleaner or pure laboratory-grade distilled water onto a clean, lint-free microfiber lens cloth. Ensure the cloth is damp rather than soaking wet.
- Step 3: Concentric Feathered Wipes. Begin wiping from the center of the glass toward the outer edges using gentle, concentric passes or smooth linear strokes without pressing down. Do not scrub stubborn spots with aggressive localized pressure. Instead, let the moisture from the lens cleaner break down finger sebum and dried water marks over two or three gentle passes.
- Step 4: Dry Buffing and Backlight Inspection. Take a second, completely dry microfiber cloth reserved exclusively for optical glass and gently buff out lingering moisture streaks. Once clear, hold an inspection light at an oblique forty-five degree angle behind the glass. This grazing light instantly reveals hidden smudges, micro-fibers, or oily residue that would otherwise wash out camera contrast under studio key lights.
Identifying the Coated Side of Your Glass
Nearly all beam-splitter teleprompters feature a designated coated side and an uncoated substrate side. Identifying which surface faces the talent is critical for both reflection clarity and safe handling. If the glass is mounted backward, the presenter reads a faint double-image known as ghosting, caused by light bouncing off both the front and rear boundaries.
To verify the coated side, place the tip of a fingernail or the plastic cap of a pen against the glass surface. If there is a noticeable gap between the object and its reflection, you are touching the uncoated glass side because the reflection is originating from the rear surface. If the object touches its reflection directly with zero gap, you are touching the optical coated face. The coated face should always point toward the talent and the teleprompter monitor, while the uncoated back face sits enclosed inside the dark optical hood facing the camera lens.
Maintaining Optical Performance on Set with Prompter Share
Physical cleanliness is only half of the contrast equation on camera. Any unnecessary backlight spill coming from your prompter display will bounce through the rear of the beam-splitter and wash out the shadow detail of your sensor. Pairing clean glass with modern browser-driven software guarantees that your prompting system stays quiet, reliable, and optically pure.
With Prompter Share, operators control the script remotely from any laptop while talent reads on an iPad, tablet, or field monitor positioned beneath the glass. Prompter Share displays text using a dedicated high-contrast dark theme (#0B1416), ensuring that unused screen areas emit zero light pollution into the optical shroud. When using a beam-splitter rig, tapping the M shortcut activates instant hardware-free mirroring. The talent reads the properly flipped reflection through the pristine glass, while the operator keeps a clean, unmirrored view on their control screen without confusing display drivers.
Safe Studio Handling and Storage Procedures
The best way to clean teleprompter glass is to keep it clean in the first place. Establish disciplined camera department habits across your prep and wrap routines.
- Handle Exclusively by the Edges: Train every crew member, grip, and production assistant to handle the glass by its polished bevel edges or while wearing powder-free nitrile gloves. Finger oils contain fatty acids that harden on optical coatings over time.
- Store in Padded Sleeves: When striking the rig, slide the pane into a dedicated padded microfiber pouch or hard-shell flight case before packing light stands. Never allow metal rods, thumbscrews, or quick-release plates to contact bare glass inside an equipment trunk.
- Isolate Microfiber Cloths: Keep your optical teleprompter cloths sealed inside airtight plastic zip bags in your camera kit. If an optical cloth is tossed loosely into a grip bag, it gathers stray grit, sand, and chalk dust, transforming it into a hazard on its next wipe. Wash your microfiber towels separately using liquid detergent without fabric softeners.
- Prevent Cough and Spit Damage: Presenters and animated speakers naturally project tiny saliva particles when delivering lines. If left to dry under hot studio key lights, saliva spots etch into thin chemical coatings. Make a habit of doing a quick inspection and gentle wipe-down at the end of each production day.
By treating your beam-splitter glass with optical care, you prevent costly pane replacements and keep your camera package delivering deep blacks and clean contrast on every shoot.
Streamline your production workflow and drive scripts smoothly from anywhere using Prompter Share.