Teleprompter Camera Height and Eye Line: The DP Guide to Natural Eye Contact
Learn how to dial in optical camera height, beam-splitter glass angle, and script reading height to create direct, natural eye contact on camera without looking off-axis.
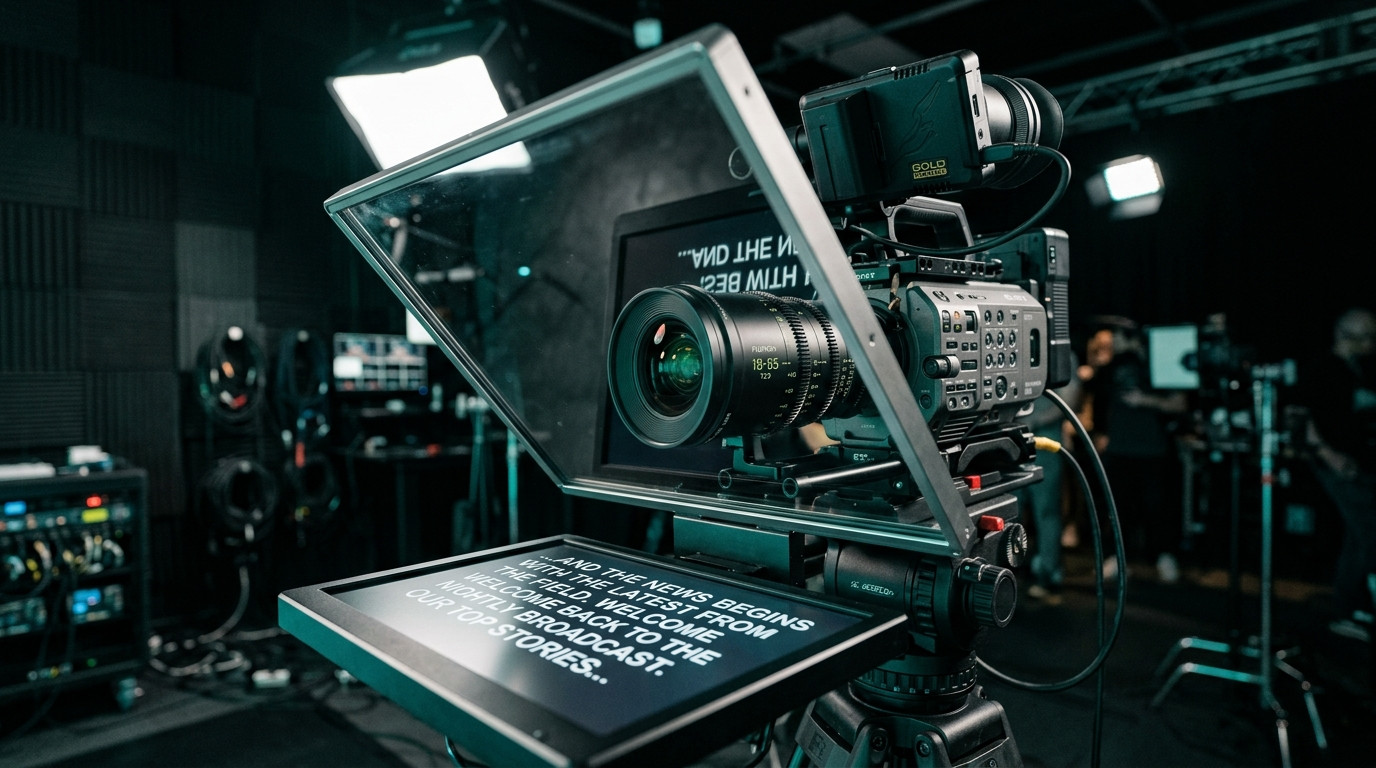
Direct eye contact on video builds immediate trust with your audience. When a presenter talks straight down the barrel of the lens, viewers feel like they are engaged in a personal, one-on-one conversation. Bringing a teleprompter into the equation should make that connection effortless by removing the cognitive load of memorizing lines. Yet all too often, poorly rigged prompters create the exact opposite effect: talent whose eyes sit slightly below the lens, gaze levels that seem hooded, or eye lines that float uncomfortably above the viewer.
Achieving dead-center optical alignment is not an accident of tripod placement. It requires understanding optical centerlines, beam-splitter reflection geometry, and the subtle mechanics of where human eyes track reading text. When you calibrate your camera height and prompter rig properly, reading completely disappears from the screen.
The Anatomy of Eye Line Geometry
The core promise of a beam-splitter teleprompter is putting the text reflection on the exact optical axis of your camera lens. The camera sits behind a 45-degree angled sheet of coated glass, looking through the optical window while the presenter reads the reflected script from a horizontal tablet or monitor beneath it.
However, glass geometry only works if the talent's eye level matches the physical height of the lens. When the camera sits two inches too high, the presenter tilts their chin up to read, exposing neck muscles and looking detached. When the camera sits two inches too low, the presenter angles their head down, casting dark shadows into eye sockets and looking guarded. The lens centerline must sit exactly level with the talent's pupil line at resting posture.
Step-by-Step Rig Calibration for Dead-Center Contact
Follow this five-step physical checklist before rolling rehearsal takes with any seated or standing talent:
- Lock Talent Position First: Have your presenter sit comfortably in their final interview chair or stand on their marked tape. Do not calibrate to an empty mark or allow slouching during setup.
- Level the Tripod Head: Use the bubble level on your tripod head to guarantee that your camera baseplate is completely horizontal. Any tilt in the tripod plate will introduce an awkward diagonal drift across the glass reflection.
- Match Lens Center to Pupil Height: Sight across from the center of the front lens element directly to the talent's eyes. Raise or lower your tripod pedestal until the optical center forms a perfectly flat horizontal line to their pupils.
- Square the 45-Degree Glass: Verify that the beam-splitter hood is set to exactly 45 degrees relative to both the lens and the horizontal display screen. If the glass angle slips forward or backward, the text reflection moves vertically off the lens axis.
- Anchor the Active Reading Zone: The human eye reads across a narrow horizontal band. Configure your prompter display so the active line scrolls directly across the center third of the glass, aligning squarely over the lens opening.
Using a flexible platform like Prompter Share makes fine-tuning this active reading band frictionless. Because Prompter Share features an integrated line marker guide and responsive text margins, you can instantly confine your script to the precise sweet spot directly in front of the lens pupil.
Preventing Off-Axis Eye Drift
Even with perfect tripod height, talent often appears to look slightly off-camera if their reading window is allowed to scroll too high or drop too low on the glass. When text enters from the very bottom edge and exits out the top, the talent's gaze tracks an elevator path up and down the frame.
To stop this vertical gaze sweep, train your operator to keep the current sentence locked onto the middle guideline. If the presenter speaks quickly, accelerate the scroll speed to keep the spoken words dead center rather than letting the presenter read ahead into the top quarter of the glass. If the talent pauses, stop scrolling immediately using the spacebar so their eyes stay centered rather than trailing downward into incoming copy.
Adjusting Distance to Widen the Sweet Spot
Camera-to-subject distance plays a massive role in eye line tolerance. When talent sits three feet from a compact teleprompter hood, every tiny eye shift across a line of text is magnified on camera. The viewer clearly sees the presenter scanning from left to right.
Pushing the camera rig back to six or eight feet and zooming in with a tighter focal length compresses the angular field of view. From that distance, a four-inch line of text subtends a tiny angle relative to the lens, making horizontal eye drift practically imperceptible. Pair that extended distance with tighter text margins inside your prompter software to concentrate all reading directly over the glass centerline.
Controlling the Rig from Camera Position
In smaller studio setups or solo creator environments, the person directing the shoot is often standing directly beside the camera, verifying focus and audio levels. Stepping away to a separate operator desk to adjust scroll timing breaks the rhythm of the shoot.
With Prompter Share, operators can launch a secondary mobile remote control link directly on a smartphone. This allows you to stand right at the matte box, inspect the talent's eye reflection through the glass with your own eyes, and drive speed, pause, or line jumps seamlessly. Built-in wake lock ensures the talent screen never dims or sleeps mid-take, keeping your eye lines rock solid throughout the entire session.