The DP Guide to Choosing Lenses and Balancing Beam-Splitter Teleprompter Rigs
Master teleprompter lens selection and studio rigging. Learn how to prevent wide-angle vignetting through beam-splitter hoods, balance front-heavy cinema packages on tripod heads, minimize light loss, and pair modern optical setups with real-time remote teleprompter controls.
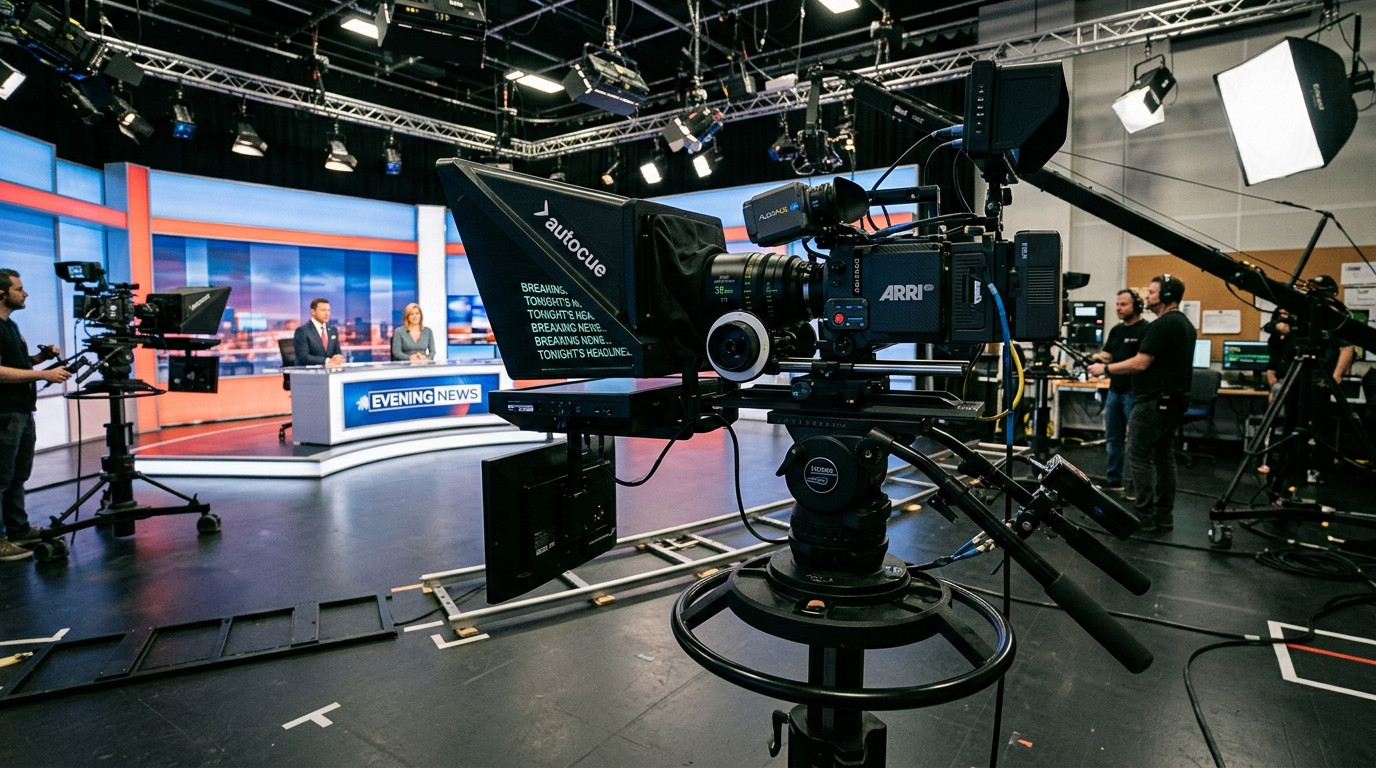
Mounting a camera behind a 70/30 beam-splitter hood changes the physical dynamics of your camera package. Beyond simple framing decisions, putting glass in front of your objective element alters rig balance, introduces potential optical vignetting, and creates mechanical clearance challenges. A lens that performs flawlessly on a fluid head in standard configuration can easily cause cutoffs or balance issues when clamped to a prompter sled.
For directors of photography, studio technicians, and video producers, dialing in your lens selection and mechanical balance is foundational to getting a clean take. Here is how seasoned camera crews select focal lengths, eliminate vignetting, and stabilize prompter rigs on set.
The Optical Clearance Problem: Avoiding Frame Vignetting
The most frequent physical mistake when rigging a teleprompter is pairing a wide-angle lens with a narrow glass hood. Because the beam-splitter glass sits at a precise 45-degree angle in front of the lens front element, the optical field of view expands outward through an angled rectangular tunnel.
If your focal length is too wide, the outer perimeter of your frame catches the matte box frame, the glass bevel, or the interior neoprene fabric of the hood. This creates hard mechanical vignetting around the edges of your sensor readout.
- Full-Frame Sensors (35mm): As a general rule, avoid focal lengths wider than 35mm on standard 10-inch to 12-inch compact prompter glass. If your setup requires an intimate talking head with environmental background context, 28mm is often the absolute cutoff, and only when the front element is pressed tight against the rear shroud.
- Super 35 and APS-C Sensors: Maintain a minimum focal length of 24mm. Anything wider risks clipping the prompter frame corners unless you step up to an oversized 17-inch or 19-inch presidential or broadcast glass enclosure.
- Micro Four Thirds: Stay at or above 17mm to keep your frame clean and free of dark edges.
Always verify your frame with the lens iris stopped down to f/5.6 or f/8 during prep. Wide open, subtle vignetting can hide in shallow focus roll-off, only to show up as sharp black corners once you increase depth of field under key lights.
The Eye-Line Sweet Spot: Why 50mm to 85mm Delivers the Cleanest Takes
Optical framing directly dictates presenter comfort. Wide lenses force your camera closer to the presenter to achieve standard medium close-up framing. When a subject sits three feet from a prompter screen, their eyes must physically pan across wide margins to read each sentence, exposing obvious tracking movements on camera.
By selecting a focal length between 50mm and 85mm on full-frame cameras, you create optical compression. This allows you to pull the camera package back eight to twelve feet from talent while maintaining an intimate frame. At that distance, the angular subtended arc of the text narrows down to a tight cone, locking eye lines dead center into the lens barrel without robotic side-to-side scanning.
Managing Light Transmission and T-Stop Compensation
Standard 70/30 beam-splitter glass directs 70 percent of light straight into the camera sensor while reflecting 30 percent toward talent to display the prompt text. That optical split introduces an unavoidable exposure tax.
In practical production terms, shooting through 70/30 glass drops incoming light by approximately one full stop to 1.5 stops. When dialing in your camera exposure:
- Calibrate with the Glass Installed: Never set your baseline ISO, aperture, or lighting levels with the prompter swung away. Measure your false color or waveform monitor with the camera shooting directly through the beam splitter.
- Watch for Internal Reflections: Ensure the rear rubber donut or fabric shroud wraps snugly around your lens barrel. Any ambient studio light leaking between the lens front element and the rear of the glass produces internal hazing, killing contrast and flaring your black levels.
- Match Optical T-Stops: If you are running cinema primes, remember that you may need a slightly faster base stop, such as running at T2.0 or T2.8, to compensate for transmission loss without needing to crank light fixtures to blinding intensities.
When running shoots with high-contrast displays, pair your physical glass with Prompter Share. Its built-in high-contrast dark theme (#0B1416) ensures that text glows crisp white against an ultra-deep black base, preventing stray display light from scattering across the interior lens chamber.
Balancing Front-Heavy Packages on Tripod Fluid Heads
Adding a beam-splitter assembly, riser rails, an iPad or high-bright monitor, and a heavy cinema lens moves the center of gravity several inches forward. Mounting that assembly on an undersized tripod head risks sudden catastrophic tilts or continuous drift mid-take.
To maintain precise camera operation and protect your mounting threads, execute this balancing protocol:
- Use 15mm or 19mm Baseplates: Mount the prompter sled directly to full-length continuous rail rods anchored to your baseplate, rather than hanging the prompter off the lens filter threads. Screw-on prompters add undue torque on focus rings and internal gear assemblies.
- Slide the Dovetail Plate: Mount an extended ARRI-standard dovetail or extended quick-release plate under the baseplate. Slide the entire camera package backward along the dovetail until the optical rig remains perfectly neutral with the tilt lock disengaged.
- Counterbalance with V-Mount Batteries: Position your camera accessories, wireless video transmitters, and high-capacity V-Mount batteries on the rear cheese plate. Using necessary battery weight as a natural counterbalance prevents the need for dead lead weights.
Zero-Friction Remote Software: Eliminating Physical Cable Drag
Mechanical balance does not end with metal plates and counterweights. Heavy HDMI and SDI cables running from the teleprompter tray down to an operator workstation create cable tension. When you pan or tilt to reframe talent, that hanging umbilical cord tugs the camera off level.
Modern digital workflows eliminate this cabling headache entirely through real-time cloud connections. With Prompter Share, your prompter screen needs only a lightweight tablet, iPad, or wireless monitor. The operator runs the controller from a laptop anywhere on set, driving the script with frame-accurate clock synchronization over a simple browser link.
Because talent never needs to install apps or manage complex driver configurations, you avoid heavy breakout boxes. Prompter Share includes a native beam-splitter mirror toggle (M key) to instantly flip the reflection for your 45-degree glass, alongside built-in wake lock to ensure the tablet screen never dims or falls asleep mid-interview.
Production Checklist for Teleprompter Lens Rigging
Before rolling your primary camera on your next commercial or corporate production, verify these essential setup steps:
- Confirm focal length provides zero mechanical vignetting with the lens stopped down.
- Ensure the lens hood shroud is light-tight to prevent optical flare on the rear glass element.
- Calibrate exposure and white balance through the beam-splitter glass rather than bare lens.
- Verify fluid head counterbalance across a 30-degree forward and backward tilt range.
- Open the viewer link in full-screen on talent's display and verify prompt mirroring.
- Keep a phone remote control link active on the camera operator's smartphone for quick speed adjustments right beside the lens.
Getting a clean take starts with disciplined camera mechanics. By pairing the right optical focal lengths with an evenly balanced sled and modern remote prompting software, your camera stays rock-solid while your presenter maintains an effortless, natural connection with the lens.