Teleprompter Light Leaks and Lens Flare: The DP Guide to Sealing the Optical Shroud
Learn how to eliminate teleprompter hood light leaks, rear glass ghosting, and contrast-robbing flares on camera. Master shroud sealing, lens spacing, matte box flagging, and high-contrast dark-theme prompting for clean takes.
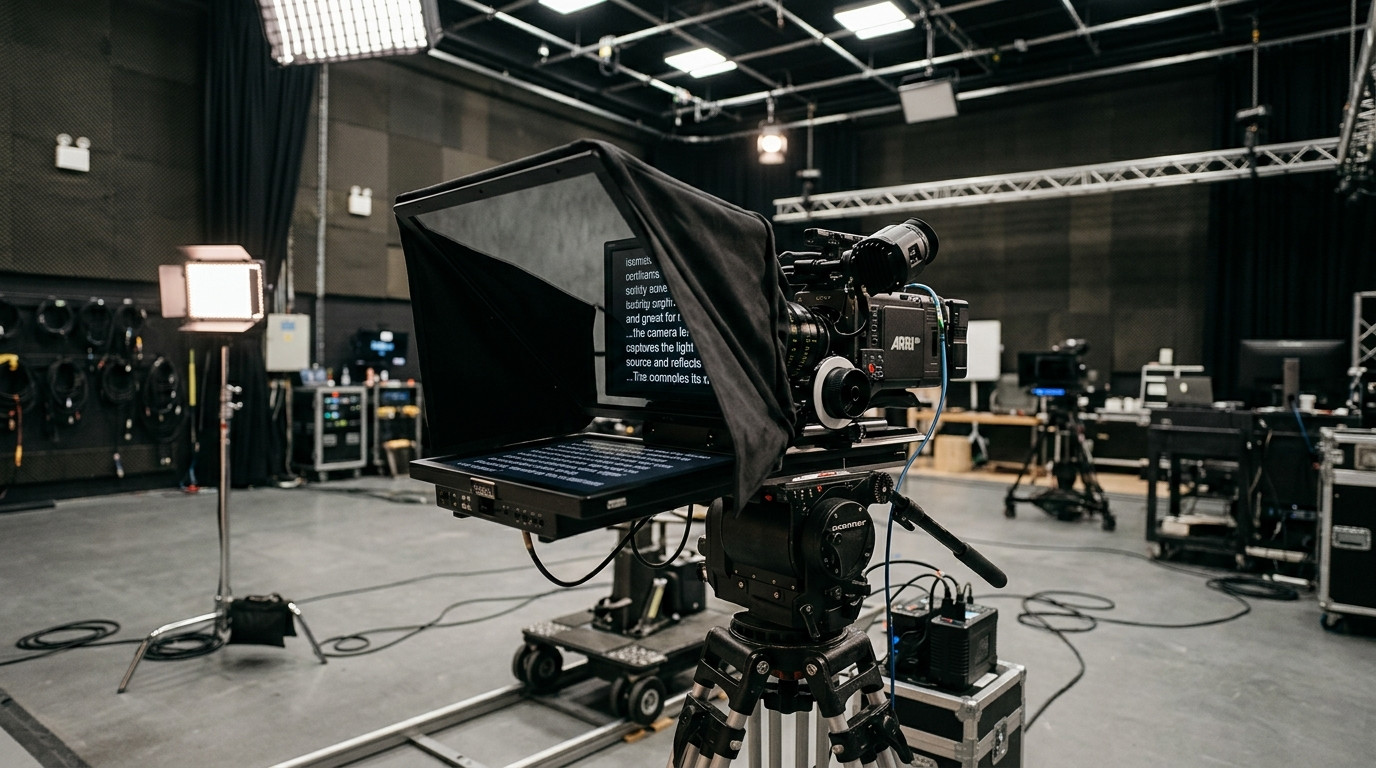
Few things ruin an otherwise flawless camera take faster than low-contrast optical haze or ghosted script lines bleeding into your camera sensor. During talking head recordings and commercial video shoots, lighting fixtures pump significant foot-candles into the studio space. When stray ambient light slips past the teleprompter hood or bounces behind the 45-degree beam-splitter glass, your image immediately suffers from washed-out blacks, milky shadows, and veiling glare.
Diagnosing optical contamination behind teleprompter glass requires understanding the exact physics of beam-splitter shrouds. By systematically sealing light paths, positioning your lens barrel, and utilizing high-contrast prompting software, you can secure crisp contrast and clean takes every time.
The Anatomy of Teleprompter Light Leaks and Ghosting
A beam-splitter teleprompter relies on an isolated optical dark chamber positioned between the back surface of the 70/30 or 60/40 glass and the front element of your camera lens. The front of the glass transmits incoming light from your subject into the lens while reflecting text upward from the horizontal display screen into the presenter's eyes.
Optical contamination happens when light enters the rear side of the chamber where it does not belong. This usually traces back to three mechanical vulnerabilities:
- Loose fabric shrouds: Elastic drawstrings or cloth hoods that fail to wrap tightly around irregular cine lens bodies, zoom rings, or matte box donuts.
- Backlight and rim light spillage: Overhead hair lights, studio grid instruments, or hard edge lights aimed near the camera position that strike the rear perimeter of the hood.
- Monitor surface back-bounce: Ultra-bright prompter screens that blast excess illumination into the glass chamber, scattering bounce light across the interior matte surfaces and into the front lens element.
When stray light penetrates this chamber, the glass acts like a two-way mirror in reverse. Rather than passing clean, unobstructed photons from your talent, the camera sensor records a faint reflection of the interior hood or a milky haze that destroys your dynamic range.
Step 1: Calibrate Lens Proximity and Shroud Geometry
The primary physical defense against flare is minimizing the air gap between your camera's front lens element and the beam-splitter glass. Mounting your camera too far back on the 15mm rod support system creates a massive internal cavity that catches ambient reflections.
Slide your camera baseplate forward until the front rim of your lens barrel sits within one to two inches of the angled glass without physically making contact during camera vibration. Position the lens dead-center along the horizontal and vertical axes of the glass to avoid optical vignetting.
Next, dress the shroud. Standard elastic hoods often bunch up around lens control gears. Use black camera tape (paper tape or photoflex cloth tape) or cine-grade duvetyne fabric wraps to seal any micro-openings around the lens collar. If you use a matte box with rod-mounted eyebrows or side flags, ensure the teleprompter hood overlaps the matte box ring completely rather than resting behind it.
Step 2: Control Incident Studio Lighting Angles
Studio lighting design must account for the giant reflective surface sitting on your camera tripod. Even an airtight hood can suffer from optical flare if key lights or fill sources strike the outside face of the beam-splitter glass at an acute angle.
Maintain strict separation between your key softboxes and your camera axis. Place your key light at an angle of 30 to 45 degrees relative to your talent, keeping it elevated above eye level. This positioning illuminates the presenter's face while directing spill away from the glass. Attach honeycomb grids or fabric eggcrates to softboxes to tighten the beam spread and prevent stray photons from washing out the prompter surface.
For hair lights and rim fixtures mounted on C-stands or studio ceiling grids, position French flags or solid black foamcore directly in front of the lamp housing. Ensure the shadow edge falls cleanly behind your teleprompter hood, shielding the rear optical zone from overhead illumination.
Step 3: Run High-Contrast Dark Display Software
Many producers overlook the prompter display itself as a source of internal lens flare. If your prompting software uses light gray backgrounds, colored interface toolbars, or glowing browser chrome, that excess luminance reflects straight off the interior glass and right into your camera lens.
Your prompter display should project pure text against an ultra-deep black field. Modern remote prompting workflows like Prompter Share solve this optical challenge through a purpose-built dark theme (#0B1416) optimized specifically for beam-splitter setups. Because Prompter Share runs entirely in full-screen presenter mode without borders or bright system bars, only the active script lettering reflects off the glass, keeping the interior chamber dark and non-reflective.
Prompter Share also features an instant beam-splitter mirror toggle (activated via the M key shortcut) that flips your text horizontally for 45-degree glass reflection. This hardware-free mirroring operates seamlessly while your remote operator controller maintains a regular, un-mirrored layout on a separate computer screen across the studio or halfway around the world.
Step 4: Lens Filtration and Polarizer Considerations
In high-reflection studio environments, adding a high-grade Circular Polarizer (CPL) to your camera lens can help cut residual glass flare. Rotating the CPL filter lets you block specific polarized light rays bouncing off the inner face of the beam-splitter.
Be mindful of exposure compensation when introducing optical filters. A 70/30 beam-splitter glass already consumes approximately one full stop of light, and a circular polarizer introduces an additional 1.5 to 2 stops of light loss. Compensate by adjusting your key lighting output or elevating your camera sensor to its clean native ISO rather than opening your aperture too wide, which could introduce unwanted shallow depth-of-field drift while reading.
Step 5: The Pre-Take Flashlight Inspection Routine
Before calling for sound speed and roll camera, institute a two-minute optical inspection on set:
- Power down the prompter monitor: Look directly through your camera monitor or viewfinder with the prompter display turned off. If you see any gray haze, ambient silhouettes, or glowing lens rings, your shroud has a light leak.
- The flashlight sweep: Have a grip or camera assistant slowly circle the perimeter of the teleprompter rig with a small LED flashlight while you monitor the camera feed. Any spike in flare pinpointed on your EVF immediately reveals where the hood requires extra gaffing or duvetyne baffling.
- Adjust monitor luminance: Power the prompter monitor back on and dial down the screen brightness until the text is comfortably legible for talent without illuminating their chest with downward monitor spill.
- Activate screen wake lock: Verify your talent viewer screen will not dim or sleep mid-take. Prompter Share incorporates built-in wake lock technology on all plans, ensuring the talent tablet maintains locked luminance throughout extended takes.
Zero-Friction Prompting for Professional Camera Rigs
Eliminating lens flares and hood light leaks transforms your teleprompter from an awkward optical hurdle into a transparent studio asset. By combining a light-tight duvetyne seal, disciplined studio grid flagging, and dedicated high-contrast prompting software, your camera captures rich contrast, deep blacks, and crisp detail.
Ready to upgrade your studio and location prompter setup? Launch your next shoot with Prompter Share. Send a single browser link to your talent tablet, drive the script with frame-accurate sync from your laptop or mobile phone remote, and capture clean takes without cumbersome hardware dongles or optical flare.