Teleprompter Tripod Counterbalance: The DP Guide to Balancing Front-Heavy Rigs
Master tripod counterbalance calibration, center-of-gravity alignment, and sliding baseplate adjustments for front-heavy beam-splitter teleprompter setups to eliminate camera tilt drift and protect studio gear.
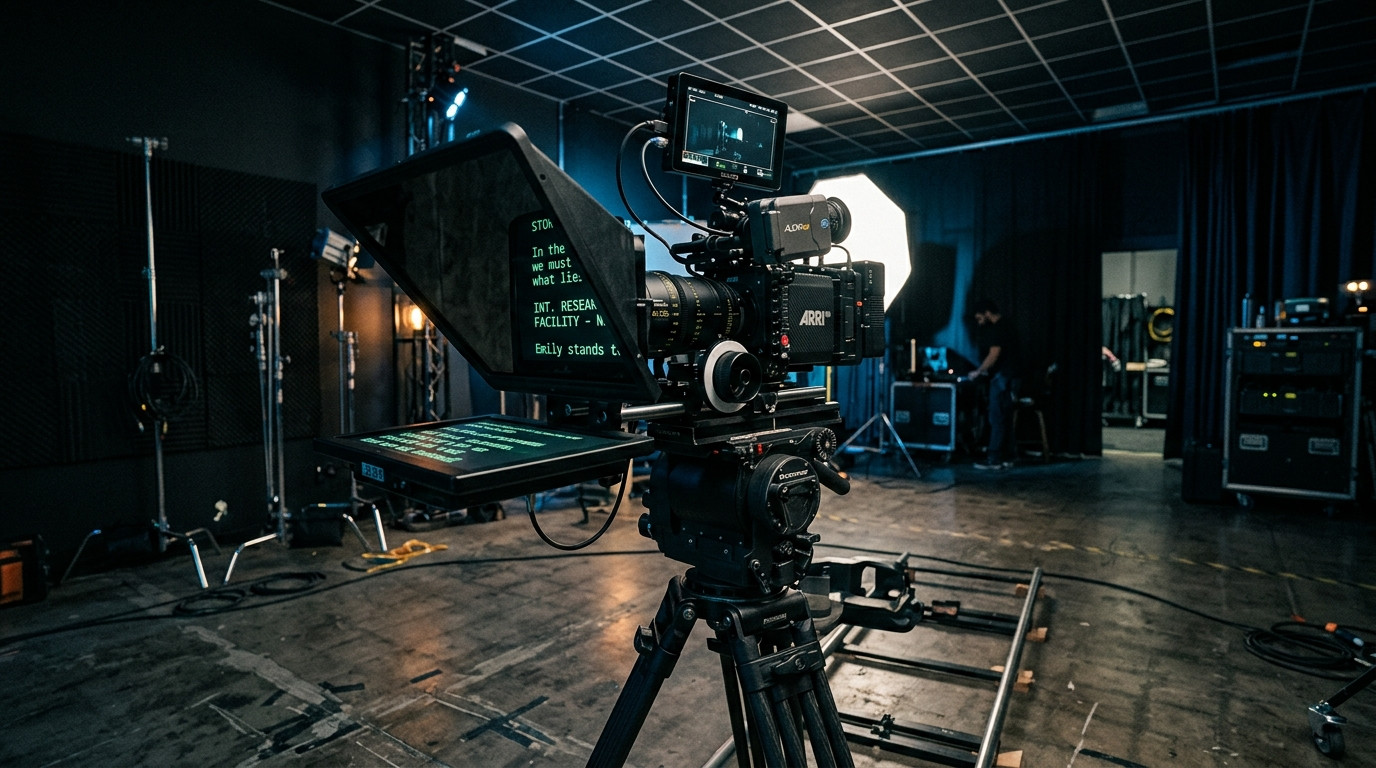
Mounting a 70/30 beam-splitter glass assembly, aluminum sled rails, and an iPad or field monitor directly in front of a cinema lens fundamentally shifts your camera package's center of gravity. Directors of photography and video producers routinely encounter the sudden front dip: unlock the tilt clutch on your fluid head, let go for half a second to adjust a mark, and the entire rig pitches forward toward the floor. This imbalance strains fluid head cartridges, causes micro-jitters during subtle camera pans, and fatigues operators who spend long shooting days physically holding the camera upright.
The Physics of Front-Heavy Beam-Splitter Systems
A standard cinema or mirrorless rig balances its center of gravity directly above the tripod head's center column. The moment you clamp a teleprompter frame to 15mm or 19mm rods, you suspend several pounds of metal, glass, and electronics 8 to 14 inches forward of the camera sensor plane. This creates a severe rotational lever arm.
Fluid heads rely on internal counterbalancing springs to neutralize this rotational force. Most entry-level video heads provide fixed counterbalance, while professional heads from manufacturers like Sachtler or Manfrotto offer stepped or continuous multi-stage dials. If your rig's center of gravity sits even one inch forward of the pivot point, no amount of fluid drag friction will stabilize the camera safely. Relying on friction locks rather than true counterbalance burns out fluid seals and guarantees jerky camera reframing between takes.
Step 1: Establishing the Mechanical Zero on the Sled
Before touching your tripod's spring tension knobs, you must mechanically balance the physical mass across the mounting plate.
- Build the complete camera package first: Mount the exact lens, matte accessories, wireless audio receivers, batteries, prompt monitor, and glass hood before placing the assembly onto the tripod head. Any component added later ruins the mechanical zero.
- Loosen the dovetail or quick-release plate clamp: While firmly holding the camera handle with one hand, slide the entire baseplate backward. On substantial beam-splitter setups, you may need an extended 12-inch or 18-inch dovetail plate to provide enough rear travel.
- Find neutral balance at zero tilt: Slide the rig until it rests horizontally with both the tilt friction and the tilt lock completely open. When you remove your hands, the camera should remain level on the horizon without tipping forward or backward.
Step 2: Calibrating the Dynamic Tilt Counterbalance
Static horizontal balance is only half the equation. As the camera tilts up or down, the center of gravity shifts higher and further away from the fulcrum, requiring progressively higher spring tension.
To dial in your dynamic counterbalance:
- Tilt the rig to 45 degrees downward: Carefully angle the lens down toward the talent floor mark and gently release your grip.
- Observe the spring reaction: If the rig continues falling forward, your counterbalance setting is too low. If the camera springs back toward the horizontal plane, your counterbalance setting is too high.
- Adjust the counterbalance dial: Click the stepped dial up or rotate the continuous knob until the rig stops dead and holds its position anywhere between negative 45 and positive 45 degrees without locking the tilt lever.
- Tune fluid drag: With counterbalance set correctly, you can dial fluid drag down to light resistance for silky smooth tracking movements rather than using it as a brake.
Step 3: Managing Cable Drag and Off-Center Accessories
Rig balance is frequently destroyed not by the glass, but by stiff cabling hanging off the prompter monitor. Thick SDI, HDMI, and AC power cords hanging down from a camera-mounted tablet act as an unpredictable pendulum, introducing dynamic drag whenever you tilt or pan.
Modern production workflows solve this clutter by shifting to clean, wireless browser setups. Using a cloud-driven solution like Prompter Share lets you run prompting over the talent tablet's existing Wi-Fi connection without stringing video cables back to an operator desk. The talent screen runs inside any browser on an iPad or Android slate, while the built-in wake lock prevents the screen from going black during long takes. Eliminating heavy video cables removes dynamic cable pull entirely, keeping your fluid head balanced from call sheet to wrap.
Freestanding Prompter Stands Versus On-Camera Mounting
When working with lightweight tripods, travel sliders, or motorized jibs, mounting an entire teleprompter assembly directly to the camera rods may exceed the tripod's payload envelope or create top-heavy wobble. In these scenarios, DP crews separate the prompter from the camera platform.
By mounting the beam-splitter hood and monitor onto a separate heavy-duty C-stand with a sandbagged turtle base, the teleprompter sits stationary directly in front of the lens. The camera moves, pans, or zooms behind the glass without carrying any front-end weight. When utilizing this setup, you can engage Prompter Share's hardware-free mirroring toggle (using the M shortcut on the controller) to flip the web display for the 45-degree beam-splitter glass without messing with OS-level monitor settings or hardware reversing boxes.
Field Checklist for Safe Teleprompter Rigging
- Observe the 70 percent payload rule: Ensure the combined weight of your camera body, heavy cinema glass, rods, teleprompter monitor, and hood does not exceed 70 percent of your tripod head's rated maximum payload.
- Sandbag the rear tripod legs: Counteract the forward lever arm by placing a 20-pound sandbag across the rear spreader leg of the tripod.
- Center the optical axis: Align the center of your camera lens precisely with the center crosshair of the beam-splitter glass to avoid vignetting or asymmetric light refraction.
- Verify secondary locks: Always engage the mechanical safety pin on your dovetail receiver so the plate cannot slide out during balance adjustments.
Maintaining Production Momentum Between Takes
A properly counterbalanced teleprompter rig allows single operators and camera assistants to reframe effortlessly, adjust eyeline angles for standing or seated talent, and transition between setups without fighting mechanical resistance. Pair your balanced camera package with Prompter Share to control scrolling speeds, line jumps, and script revisions in real time from a phone or laptop at the camera, ensuring rock-solid stability and zero downtime on set.